Pages

Saturday, December 3, 2011

Our Tree-Cutting Tradition

I could write a book about our annual tree cutting expeditions—it’s always an experience! To start with we get lost almost every year and drive forever to find the tree farm.  For the past several years we’ve gone to the same place and we still get lost.  The good news this year is that we saved the postcard the tree farm mailed and drove straight to it.  The bad news is that we had pouring rain.  We’ve cut trees in all kinds of weather but this was the first year we had rain. Many years we’ve had knee-deep snow and sub-zero temps so overall it wasn’t too bad.

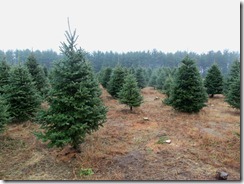
We go to Whispering Pines Tree Farm in Saxeville.  They do a nice job of pruning the trees so you can always find one that’s nicely shaped. 

Tree Cutting-2

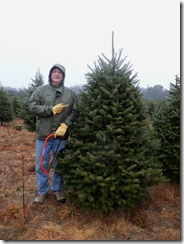
We have a tendency to underestimate how big a tree is when it’s in the field so some years we end up with a huge tree that has to be cut down to fit in the family room. I’ve finally figured out that I need to look at it with Jim standing next to it to get a better idea of how big it is. 

Tree Cutting-1

We ended up getting a nice tree (not this one) and didn’t have a single mishap.  We even sprung for a new tree stand so we didn’t have to fight to get it in the stand and straight.  We’ll probably decorate it tomorrow while we watch football.  I always like the fresh pine scent in the house.  I hope the cats don’t knock it over.  So far they haven’t shown much interest but we still might anchor it to the ceiling!

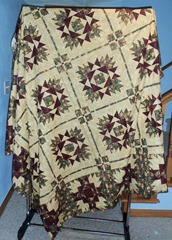
I was able to sneak in a little sewing today.  I pressed the Courtyard Maze top and sewed borders on Santa’s Little Helpers and 12 Days of Christmas.  My tip for the day is to sew borders with the border on top. For some reason, when I do that the borders are nice and flat.  I used to sew them with the quilt top on top so I could make sure the seams didn’t turn, but when I did it that way the borders ended up wavy.  It might just be a fluke but I’m sticking with it!

After the borders I sewed and pressed backings for all three and then got the batting cut.  They are now ready for quilting.  I’m hoping to get up early in the morning and get one loaded.  It would be nice to get at east two of them quilted tomorrow.  I’m planning to do freehand allover designs so the quilting should go fast.  I’ll post photos when I get them finished.

Friday, December 2, 2011

Full Disclosure-Part 1

Like most quilters I have UFO’s—lots of UFO’s. When I started quilting I took classes every chance I had. I learned many techniques but didn’t always finish the projects. During the years I was a quilt shop owner I continued to take classes as well as teaching classes and clubs and making shop samples. A very conservative estimate is that I started two quilts a week for over twelve years. Since closing the shop I’ve started many more projects and have loads of kits that are still in packages. Over the past twenty years I’ve finished hundreds of quilts but I still have hundreds of unfinished ones. I’ve got to start working through my bins of UFO’s and get rid of them one way or another—finish them, trash them or give them to someone else to finish. I’ve been donating lots of quilts and this will give me more donation quilts without a huge additional cash outlay.

I’ve had a laundry basket under my sewing table for a few years. It’s filled with UFO’s but I don’t even remember what’s in there. In this post, I’ll start going through this basket and listing what I have and what needs to be done to finish the quilt. It should be fun to see what’s in there. I’m sure it will end up being a little trip down memory lane!  It will take a few posts to get through everything in the basket, but here’s a start.

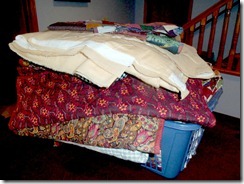
THE BASKET—you can see it’s overflowing.  More than time to root through it to see what’s there!

The Basket

I dumped it out so I can work from bottom to top.  I know there are some new things in it because I just cleaned my sewing room and crammed a couple of current projects on top!

Project #1:  This was a project from Thimbleberries Club.  Each year we would work on a large block of the month quilt as the main project.  Usually there was an additional project each month that would use fabrics from a current Thimbleberries line.  I think this quilt is called Flying Dutchman.  The reason I quit on it is because the border is wrong for the quilt.  Even when you look at the picture you can barely see the border—it just fades out.  A lot of the quilting is complete. To finish it, I think I’ll remove both the inner and out borders, finish the quilting and bind it.  It really doesn’t need the additional borders.

TB flying geese

Project #2:  This quilt was a from a Debbie Caffrey mystery I taught several years ago.  I hadn’t set the blocks together, but last year finished the top.  It needs to be quilted and bound.  I really should finish this—I love the quilt (even if it does have metallic fabric!).

Mystery

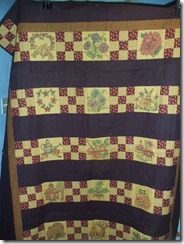
Project #3:  This is another Thimbleberries project.  One year the main quilt centered around these calendar blocks.  For this bonus project, I colored in the blocks with crayons. This quilt just needs a little more quilting.  It’s already bound, so a hour or two of work will get it out of here!

TB Calendar

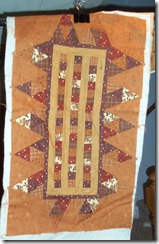
Project #4:  This table runner is from a free pattern we gave away.  The pattern is from Quilt Retailer magazine.  I made two or three of these already.  I started this one in a class I taught using the Tri-Recs tools.  This just needs to be quilted and bound.

indian corn

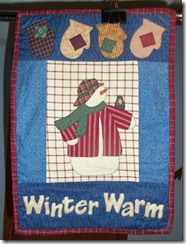
Project #5:  I can’t believe this wall hanging has been sitting around for years unfinished.  It will take about 15 minutes to complete.  It just needs some beads sewn on the snowman for eyes and buttons to embellish the mittens. 

winter warm

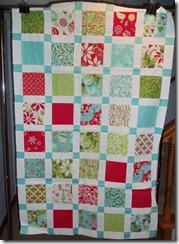
Project #6:  This is a relatively new project.  I started it last year.  It’s simply sashed squares.  I have the border fabric with it and I think the backing is somewhere around here.  It needs the outer border, quilting and binding.  I need to finish it and put it up for sale on Etsy before Christmas!

moda christmas

That’s the first batch of projects from the basket.  Let’s see how I do in making progress on them!  Of course, I’ve also got several current quilts I’m working on but I really need to get moving on some of these old UFO’s. 

Thursday, September 1, 2011

September already?

What a summer of change in our house. When we dropped our daughter Jen off at school last Saturday we became empty nesters. It seems so strange for the house to be so quiet. I'm sure I'll get used to it but it's really a change. Last night Jim and I went down to Waterfest in Oshkosh to see the Doobie Brothers. It was a perfect evening weather-wise so it was nice just to sit and listen to the opening bands. It's great to see lots of people about our age singing and dancing to the music. The Doobie Brothers played a lot of their old hits and four new songs. What a fun night! Today I worked on piecing a quilt made from the Fandango line by Moda. It's a four-patch variation with sashing between the blocks. It always bothers me when the sashing doesn't line up straight along the length of the quilt. It's a little tricky to get it straight without cornerstones. Here's the easiest way I know to get it straight.
These seams should align like this:                                                            not like this:


Can you see how the seam on the right is off just a little bit? So what I do is line up a long straight pin with the seam like this:
Now, it's easy when you sew the seam to place the seam right over the pin. I stitch within a stitch or two of the pin before removing it. Make sure you don't sew over the pin.  Here's what that looks like:  See how that seam lays right on top of the pin?  It works every time!
I'm hoping to finish quilting the Scrap-Basket Surprise tonight. I've had it on the frame all week and still haven't finished it even though the quilting on it isn't that difficult. Of course, there's football tonight, both Badgers and Packers so it may not get finished!

Tuesday, June 14, 2011

Challenge to Post

I just can't seem to get in the habit of posting. While I'm at my sewing machine I'm constantly thinking "that would be a great thing to post on my blog." But when it comes to sitting at the computer and typing it out, I just don't follow through. Now I'm challenging myself to post SOMETHING at least three times a week.

Yesterday I loaded and started quilting the top I made from the Moda "Prayer Flag" fabric. Quilting the straight lines is proving to be a challenge, but I'm going to work through it because I think the quilt really calls for it. Of course, the rest of the quilting (meandering) went really quickly so the delay is kind of frustrating. Hopefully tomorrow I'll have a chance to finish it.

I DID finish the Moda "Boutique" quilt. I just loved this line of fabric and only had a layer cake and a few coordinates so it took quite awhile to decide what to do with it. I ended up just doing a geometric design with squares and rectangles. It ended up being a really pretty quilt and I just listed it on Etsy.
http://www.etsy.com/listing/76008358/boutique-lap-quilt

Here's a picture of the finished quilt. I quilted it with my favorite pantograph called "plumage." It's just a soft, feather design that goes fast and looks great on these pretty, feminine quilts. The first photo shows a detail of the quilting and the second is a photo of the whole quilt.


Wednesday, February 2, 2011

Finally Posting Again

It's been such a long time since I've posted. Things got very busy in the fall and through the holidays and it just wasn't a priority. Since the first of the year I've been doing quite a bit of sewing and am trying to finish some UFO's. It's hard to resist all the beautiful new fabrics, though and I succumbed to a jelly roll of Bliss fabric from Moda. I wanted to stretch the jelly roll to make the largest quilt I could and came up with a 16-patch. I could have strip pieced the blocks, but ended up cutting individual squares from the jelly rolls. I used sixteen 2-1/2" squares for the main blocks (16-patches, lol!). I make 18 of these blocks. Then I pieced seventeen 4-patches and surrounded them with a white-on-white fabric. I sewed 2-1/2" x 4-1/2" strips to the top and bottom of the four-patches and 2-1/2" x 8-1/2" strips to the sides. Then I set these on point. I started with 12-3/4" squares for the side triangles and cut them twice on the diagonal. The corner triangles were made with 6-3/4" squares cut on the diagonal once

The inner border was cut 2-1/2 and the outer border was cut 6-1/2". I ended up with a nice size quilt, about 72" x 96".

Here's a picture of the almost finished quilt. I'm still hand stitching the binding but it will soon be DONE!